
1. About
Welcome to Finaloop. This is part two of Onboarding with Finaloop. The article Onboarding part 1 - Getting connected , explained how to sign up and connect your accounts and apps to your Finaloop account.
This article continues the onboarding process. It describes the action items (we call them ‘missions’) and what to expect during your first weeks with Finaloop. If you’ve got questions, feel free to reach out to customer support. We're here to help!
2. My Missions during the trial period
‘My Missions’ is your to-do list for the items we need to complete your books. Each ‘mission’ lets you know about missing information we need from you. You can access the My Missions screen directly from the menu pane.

Here we’ll run through the most common missions during your onboarding. Your specific missions may be slightly different, depending on the needs of your business. If you have questions on missions you don't see here, check out our article on understanding your missions.
Set a preliminary inventory method
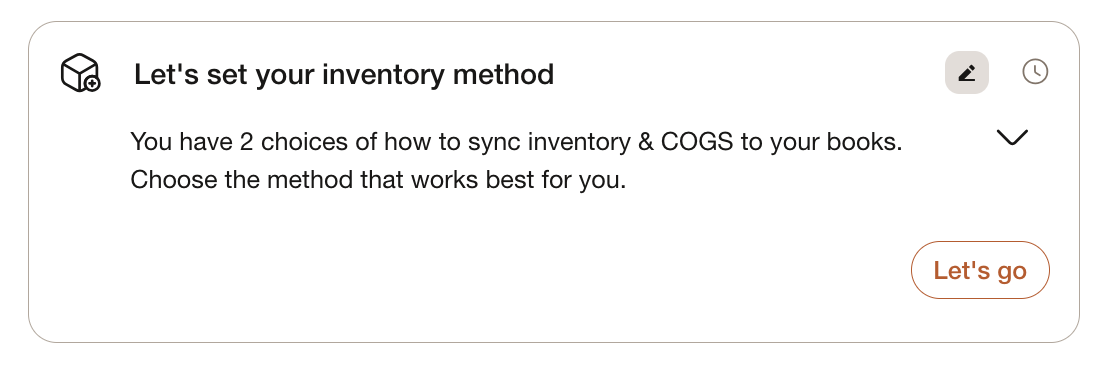
During the trial period you’ll receive a mission to set your inventory method.
In Finaloop, you can track your cost of goods sold (COGS) using one of 3 methods: purchase based, sales based, or unit based. The unit based method is an add-on feature available as part of our InventoryIQ inventory module.
Purchase based: COGS are recorded in your P&L when you purchase inventory.
Sales based: COGS are recorded in your P&L when you sell inventory based on a cost per unit or COGS you input into Finaloop.
Unit based using InventoryIQ: COGS are recorded in your P&L when you sell inventory based on a real-time landed cost per unit that we calculate based on a first-in-first-out (FIFO) method. It allows better tracking of the fluctuating cost of each unit/product and tracking inventory levels.
You can read this article on how to select an inventory method (How to choose your COGS tracking method in Finaloop) or check out this video which walks you through how to select a method that fits you best. Don’t worry, you can always change it later if you prefer another method.
>To set your inventory method:
From the menu pane, navigate to My Missions.
From the inventory method mission, click Let’s Go.
Check the relevant radio button to set the inventory method.

Click Save. The screen shows the date based on your preliminary inventory method.
Depending on your selection, the next steps to getting your inventory and COGS setup will vary.
You can check out Finaloop Academy on the platform to see all relevant learning resources for each inventory method. Just click the Finaloop Academy icon in Finaloop to learn more.

Categorize transactions
Categorizing transactions is both an important part of the onboarding process, but it’s also an ongoing action that will arise from time to time.
Finaloop uses advanced machine learning algorithms to automatically categorize about 94% of your transactions. Our team of experts will then review the remaining ones to see if we can categorize any without further input from you.
Each month, the list of transactions we need help with will get smaller but for the first month or two, expect that we’ll need input from you as we learn more about your business. If we find transactions that we don’t recognize, we’ll add a mission to your My Missions screen.
Moving forward, there shouldn’t be many unrecognized transactions, but for now please add them manually.
> To add unrecognized transactions:
From the menu pane, navigate to Transactions.
Click the Waiting for input only link (#1) to open a screen listing the transactions that need attention.

In the example, you can see that there are 6 Amazon Marketplace transactions (#2) that need input from you.
Click a transaction to open up the category screen.
Add the correct category.
Click Apply once if the category only applies to this specific transaction. Click Apply always to assign all transactions from the same payee to the category you’ve just selected.
To learn more check out Categorizing and reviewing transactions.
Unmatched payouts and transfers
Finaloop automatically matches transfers and payouts to ensure everything is reconciled.
For example, if there are transfers from one bank to another or there is a credit card payment from your bank, we’ll automatically match it to ensure everything is reconciled with no duplications.
If there are unmatched transfers or payouts, it’s often because there is a missing bank account or app. When that happens, we’ll ask you to review the accounts and apps that are synced and connect the missing items.

When you click on this mission it will take you to our Payouts & Transfers - Anomaly Detector. To learn more, check out our article on unmatched payouts and transfers.
Fill in loan details
During the onboarding process, we’ll ask you to provide us with the details on your business loans so we can ensure you have all the interest and loan details properly added to your books.

3. Additional tasks
In addition to the specific missions you’ll see, please add existing vendor bills and B2B invoices to ensure we get your books with all the details included.
Add Vendor bills
> To add vendor bills:
If you use Bill.com or Settle for managing your vendor bills, please connect them to Finaloop. If not, follow these instructions to add bills to Finaloop.
Go to Vendors>Bills from the navigation menu.
Click +Add Bill
Upload the bill PDF where it says Extract from file or enter the relevant bill details.
Click Save.
Add B2B invoices
You might have B2B invoices that are not synced directly from Shopify, Paypal or Stripe. You can add these invoices to Finaloop.
> To add B2B invoices:
From the menu pane, navigate to Customers > Invoices.
Click Add invoice.
Complete the invoice details.
Click Save.
4. Subscribe to Finaloop
After the missions are completed, it’s time to subscribe to Finaloop!
>To subscribe to Finaloop:
On the login page, click the Subscribe button and it will open the Billing screen.
You will see the two components of your subscription payment - your ‘Bookkeeping’ subscription and your ‘Pre trial catch up’.
Bookkeeping: The bookkeeping subscription is based on your annualized gross revenue with an option for a 10% discount for annual billing. For more on pricing, see our website.
Pretrial catch up: During the 14-day trial period, your books will be prepared as of the date you signed up to Finaloop + the 2 previous months. To rebuild your books as of January 1 of the current year, there is a pre-trial catch-up fee based on your monthly subscription and the number of months of catch up required.
Here’s an example
If you sign up to Finaloop on June 1, your free trial books will be prepared from April 1 - June 14. To rebuild your books in Finaloop from January 1 until March 31, there is a pretrial catch-up fee.
We highly recommend taking both the bookkeeping and pre-trial catch up because your books for the full year will be up to date and maintained in one place, avoiding discrepancies and tax headaches when filing your tax return.
3. Click Checkout. You’ll then be taken to an external payment screen to make the payment.
Once you subscribe, you’ll have some additional reports and features in Finaloop unlocked, including getting your balance sheet up to speed.
5. Missions post-trial period
Here are some of the post subscription, one-time missions we’ll need to get your onboarding completed.
Note that, depending on which inventory method you choose, you may also have additional missions to get your purchase orders or costs updated.
Upload historical transactions
Our bank and credit card integrations automatically sync data going forward as well as up to 3 months of historical data. As part of the catch-up process, we’ll need a one-time upload of historical transactions for specific time periods we can’t sync automatically.
Build the Balance Sheet
After you subscribe, we’ll open a mission called ‘Let's build your balance sheet’. In this mission, we ask you for important historical data we need to make sure your balance sheet in Finaloop is completely up to date.
Typically, we’ll need your balance sheet as at the close of the previous year and the last available tax filing year. You’ll also see a questionnaire with some important questions about your account balances. Once we’ve got that, we’ll build your balance sheet.
NOTES
1) It can take 1- 4 weeks to complete the Balance Sheet.
2) The 'mission' may be slightly different depending on your legal entity structure, so that you comply with the needs and regulatory reporting requirements.
Great! Your onboarding process is complete. Now you can enjoy real time accurate data by logging onto Finaloop whenever you want.